You can build your own private cloud to share and transfer files without restrictions using Windows 10's FTP server feature, and in this guide, we will show you how.

Setting up a File Transfer Protocol (FTP) server
on Windows 10 is perhaps one of the most convenient solutions to
upload and download files from virtually anywhere to your computer without the
limitations typically found with cloud storage services.
Using an FTP server, you are basically creating a
private cloud that you have absolute control. You do not have monthly transfers
caps and speeds can be fast (depending on your internet subscription).
Also, there not file type or size restrictions, which means that you can transfer a 1KB text file as well as 1TB backup file, and you can create as many accounts as you want to let family and friends store and share files with each other.
There are plenty third-party solutions to set up a
file server of this kind, but even though it may sound complicated, the FTP
feature bundled on Windows 10 isn't difficult to set up.
In this Windows 10 guide, we'll walk you
through the steps to set up and manage an FTP server on your computer to
transfer files within your home network or remotely over the internet.
- How to install
the FTP server components on Windows 10
- How to configure
an FTP server site on Windows 10
- How to set up
multiple FTP accounts on Windows 10
- How to connect to an FTP server remotely on Windows 10
Although Windows 10 includes support to set up an
FTP server, you need to add the required components manually.
To install the FTP server components, do the following:
- Open Control
Panel.
- Click on Programs.
- Under "Programs and Features," click the Turn Windows features on or off link.
- Expand the
"Internet Information Services" feature and expand the FTP
server option.
- Check the FTP
Extensibility and FTP Service options.
- Check the Web
Management Tools option with the default selections, but making
sure that the IIS Management Console option is checked
- Click the OK button.
- Click the Close button.
- Open Control Panel.
- Click on System and Security.
- Click on Administrative Tools.
- Double-click the Internet Information Services (IIS) Manager shortcut.

- On the "Connections" pane, right-click Sites,
and select the Add FTP Site option.
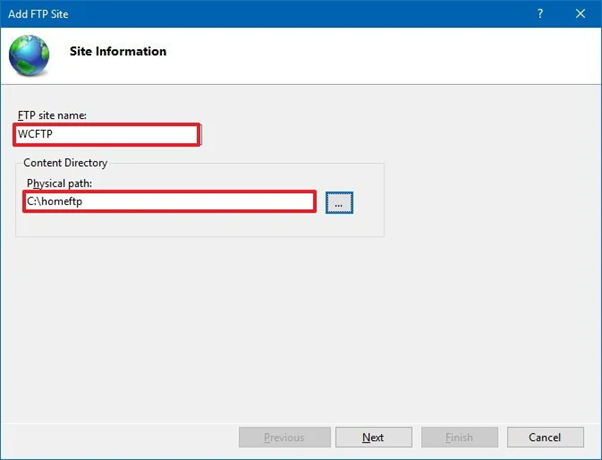
- In the FTP site
name, type a short descriptive name for the server.
- In the "Content Directory" section, under "Physical
path," click the button on the right to locate the folder you want to
use to store your FTP files.
- Click the Next button.
- Use the default Binding settings
selections.
- Check the Start FTP site automatically option.
- In the "SSL" section, check
the No SSL option.
- Click the Next button.
- In the "Authentication" section,
check the Basic option.
- In the "Authorization" section, use
the drop-down menu, and select Specified user’s option.
- Type the email address of your Windows 10
account or local account name to allow yourself access to the FTP server.
- Check the Read and Write options.
- Click the Finish button.
- Open Windows Defender Security Center.
- Click on Firewall & network
protection.
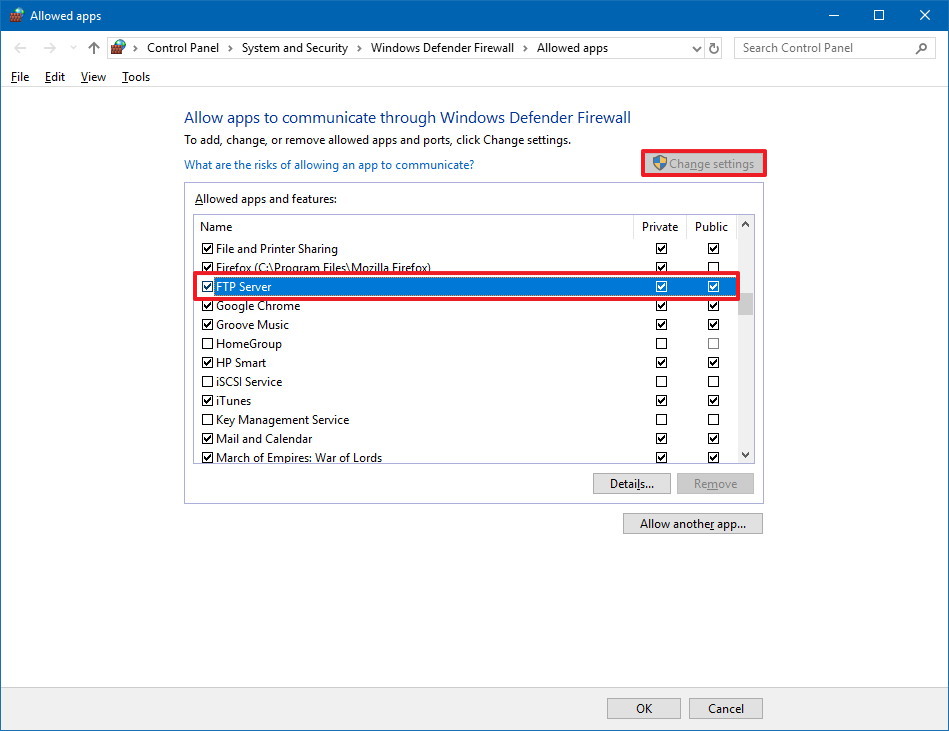
- Click the Allow an app through firewall option.

- Click the Change
settings button.
- Check the FTP
Server option, as well as the options to allow Private and Public access.


Once you have completed the steps, the components
to set up an FTP server will be installed on your device.
How to configure an FTP server site on Windows 10
After installing the required components, you can proceed to configure an FTP server on the computer, which involves creating a new FTP site, setting up firewall rules, and allowing external connections.
Setting up an FTP site.
To set up an FTP site, do the following:


Quick Tip: It is recommended to create a folder in the root of the main system drive, or on an entirely different hard drive. Otherwise, if you set the home folder in one of your default folders when adding multiple accounts, users will not have permission to access the folder. (You can adjust folder permissions, but it is not recommended.)

Important: In a business environment or on an FTP server that will host sensitive data, it is best practice to configure the site to require SSL to prevent transmitting data in clear text.

After completing the steps, the FTP site should now
be operational on your computer.
Configuring firewall rules
If you're running the built-in firewall on Windows 10, connections to
the FTP server will be blocked by default until you manually allow the service
through, using these steps:

Once you have completed the steps, the FTP server
should now be accessible from the local network.
In the case that you are running third-party security software, make sure to check your vendor support website for more specific details on adding firewall rules.
Allowing external connections
To make your FTP server reachable from the internet, you also need to
open the Transmission Control Protocol/Internet Protocol (TCP/IP) port number
21 on your router.
The instructions to forward a port will be different depending on the router, and even depending on the firmware version. In the steps below, we'll outline the general steps, but you may need to consult your manufacturer support website for specific details.
To forward port 21 to allow FTP connections outside of the local network, do the following:
·
Open Settings.
·
Click on Network
& Internet.
·
Click on Status.
·
Click the Change connections
properties option.

· Make a note of the IPv4 DNS server address, which is the address of your router. Usually, it's private address in the 192.168.x.x range. For instance, 192.168.1.1 or 192.168.2.1.

· Open your default web browser.
·
On the address
bar enter the router's IP address (for example, 192.168.1.1) and press Enter.
·
Sign-in with
your router credentials.
·
Open the Port
Forwarding page. (Usually, these settings can be found under the WAN,
NAT, or Advanced settings pages.)
·
Add a new rule to forward incoming
connections to the FTP server from the internet by including this information:
1.
Service name: Type a descriptive name for the port
forwarding rule.
2.
Port range: 21.
3.
Local IP: This is the FTP server IP address that the
router will forward incoming connections. (This is your IPv4 address. See
step No. 5.)
4.
Local port: 21.
5.
Protocol: TCP.
· Click the add button.

- Open Control
Panel.
- Click
on Network
and Internet.
- Click
on Network
and Sharing Center.
- Select
the Internet Protocol Version 4 (TCP/IPv4) option.
Setting up a static IP address
If
you're planning to transfer files over the internet in the regular basis, then
it's recommended to configure a static IP address to prevent having to
reconfigure your router in the future if your device's IP changes.
4. In the left pane, click the Change
adapter settings option.

5. Right-click the network adapter and
select the Properties option.

7. Click the Properties button.

- Select
the Use the following IP address option.
- IP
address: Specify
a static network address for the computer. You should use an address
outside of the DHCP server scope configured in your router to prevent
conflicts. For instance, 192.168.1.200.
- Subnet
mask: In
a home network, the address usually is 255.255.255.0.
- Default
gateway: This
is usually the IP address of the router. For example, 192.168.1.1.
- Preferred DNS server: Typically, this is also the IP address of your router.
9. Specify the IP settings:

- Click
the OK button.
- Click
the Close button.
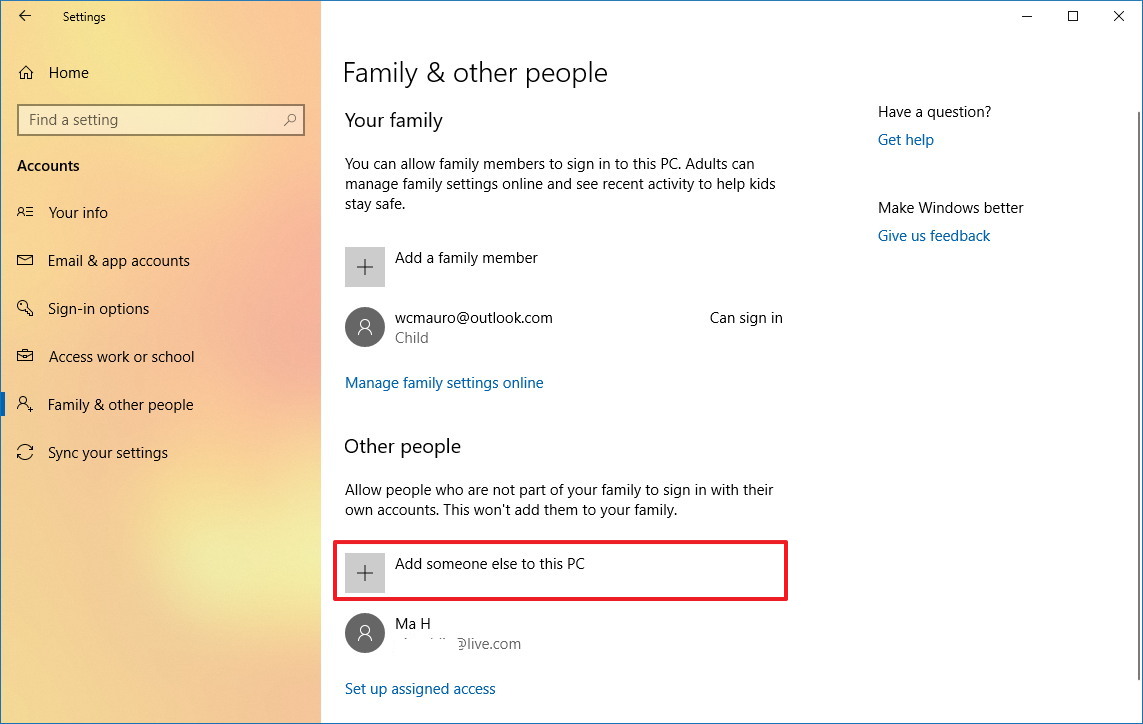
- Open Settings.
- Click
on Accounts.
- Click on Family & other people.
- Click the Add someone else to this PC button.
Once
you've completed the steps, the IP configuration will no longer change, and
it'll prevent potential connection problems in the future.
How to set up multiple FTP accounts on Windows 10
If
you want to allow multiple people to download and upload files to the FTP
server simultaneously, you need to set up multiple accounts with specific
permissions.
This
process is done by creating new standard Windows 10 accounts and configuring
the correct settings.
Creating new user accounts
To
add multiple accounts to an FTP server, do the following:

- Click
the Next button.
- Open Control
Panel.
- Click
on System
and Security.
- On
the left pane, expand "Sites," and select the site you created
earlier.
- All
Users: Allows
every user configured on your Windows 10 device to access the FTP server.
- Specified
users: You
can use this option to specify all the users you want to access the FTP
server. (You must separate each user using a comma.)
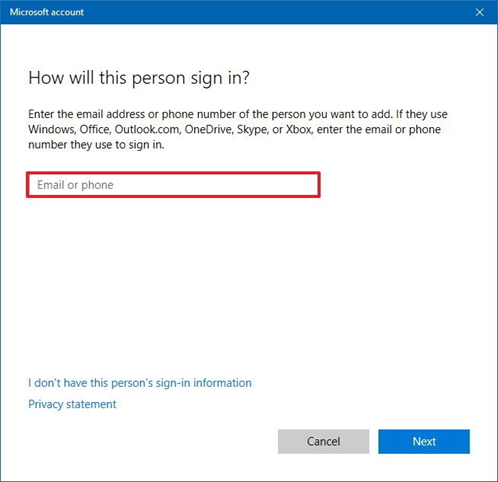
Quick Tip: If you want users to access the server using local accounts, then click the I don't have this person sign-in information option, click the Add a user without a Microsoft account option, and follow the on-screen direction to create the account.
Once you
have completed the steps, you may need to repeat the steps to create additional
accounts.
Configuring user accounts to FTP server
If
you want multiple users to access the FTP server at the same time, you need to
modify the server settings using these steps:
3. Click on Administrative
Tools.

4. Double-click the Internet
Information Services (IIS) Manager shortcut.

6. Double-click the FTP
Authorization Rules option.

7. On the right pane, click the Add
Allow Rule option.

8. Select one of these two options:
9. Check the Read and Write options.

- Click
the OK button.
- Open
a web
browser.
- In
the address bar, type the server IP address using ftp://,
and press Enter. For example, ftp://192.168.1.100.
- Type
your account credentials.
- Open File
Explorer.
- In
the address bar, type the server address using ftp://,
and press Enter. For example, ftp://192.168.1.100.
- Type
your account credentials.
After
completing the steps, all the users you specified should now be able to access
the FTP server to download and upload files remotely.
How to connect to an FTP server
remotely on Windows 10
Once
you've created and configured your FTP server, there are many ways to view,
download, and upload files.
Viewing and downloading files
If
you want to browse and download files, you can do this using Internet Explorer,
Firefox, or Chrome:
4. Click the Log
on button.

After completing the steps, you should be able to navigate and download files and
folders
from the server.

In the case that you are trying to connect from the internet, you have to specify the public (internet) IP address of the network hosting the FTP server.
The
easiest way to find out is to search for "What's my IP" in Google or
Bing within the network before trying to connect from a remote connection.
Also, unless you have an static IP address from your internet provider, or
you're not using DDNS service, you may need to check your public IP regularly
in order to connect, in case it changes.
Viewing, downloading, and uploading files
The
easiest way to browse, download and upload files is to use File Explorer with
these steps.
4. Check the Save
password option.
5. Click the Log
on button.

After
completing the steps, you will be able to browse folders and files, as well as
download and upload files as if they're locally stored on your device.

You
can avoid going through the steps to reconnect to the FTP server by
right-clicking Quick Access in the left pane and
selecting the Pin current folder to Quick Access option.
Of course, you are not limited to use File Explorer as there are plenty of FTP clients, such as FileZilla that you can use to transfer files.
Wrapping things up
In
this blog, we outlined the steps to get started with the FTP server feature
available on Windows 10, and the steps to view, download, and upload files.
However, bear in mind that you can only establish a connection if the device
hosting the service is turned on.
You will not be able to access your files when the computer is
asleep or hibernating.
The FTP Server component is available on Windows 10 Pro as well as on Windows 10 Home, and older versions of the OS, including Windows 8.1 and Windows 7.


